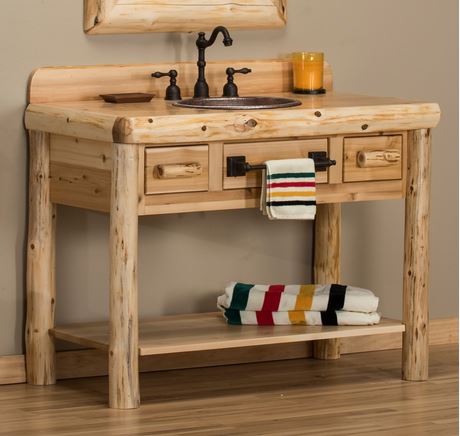
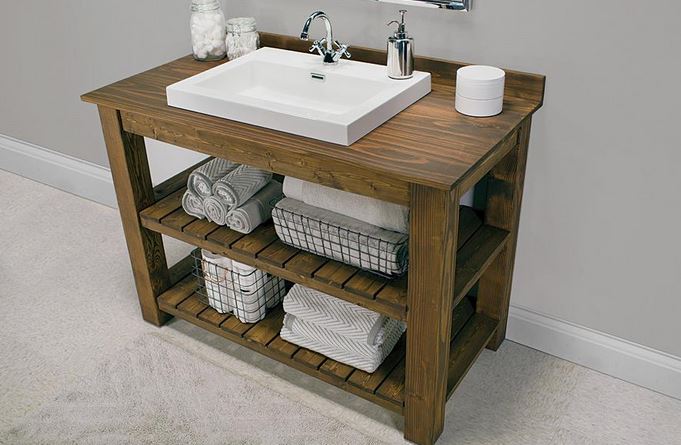
Introduction to Rustic Bathroom Vanities
Are you dreaming of a bathroom that exudes warmth and charm. A rustic bathroom vanity might just be the perfect centerpiece for your space. Picture this: reclaimed wood, intricate details, and a cozy ambiance that invites relaxation. Rustic design is all about creating a welcoming atmosphere, and incorporating a stunning vanity can transform an ordinary bathroom into an extraordinary retreat.
Whether you’re renovating or simply refreshing your decor, choosing the right rustic bathroom vanity sets the stage for style and functionality. This guide will walk you through everything you need to know about selecting, installing, and maintaining your new favorite piece of furniture. Let’s dive in!
Choosing the Right Vanity for Your Space
Selecting the right rustic bathroom vanity is essential for achieving a cohesive look. Start by measuring your space. Knowing the dimensions will help you avoid any surprises during installation.
Consider your style preferences too. Rustic vanities come in various materials like reclaimed wood or distressed finishes, each adding unique character to your bathroom.
Next, think about functionality. Do you need extra storage? A double sink? Ensure the vanity meets both aesthetic and practical needs.
Don’t overlook color harmony either. The right hue can enhance your overall design while complementing existing fixtures and tiles.
Consider the height of the vanity. Standard options may not suit everyone, so choose one that provides comfort and ease of use for all family members.
Preparing for Installation
Before diving into installation, it’s crucial to gather your materials. Make sure you have the right tools on hand screwdriver, level, tape measure, and pliers are essentials.
Next, clear out the area where your rustic bathroom vanity will go. Remove any existing fixtures or debris that may hinder your progress. This creates a clean slate for installation.
Consider plumbing requirements as well. Check if you need new pipes or fittings to align with your charming vanity design. It’s always better to address these details upfront.
Take measurements of both your space and the new vanity carefully. Ensuring everything fits perfectly will save time later in the process and help avoid unnecessary adjustments once installed. Your preparation lays a solid foundation for success in this DIY project.

Step-by-Step Installation Guide
Begin by turning off the water supply to avoid any mishaps. Then, remove your old vanity carefully, making sure to disconnect plumbing fixtures and handles.
Next, prepare the area. Clean the floor and check for any necessary repairs or adjustments. A level surface is crucial for a stable installation.
Once everything is prepped, position your rustic bathroom vanity in place. Use shims if needed to ensure it’s perfectly level.
Attach it securely to the wall with screws at designated points. This will prevent wobbling over time.
Now, connect the plumbing components from your sink to existing pipes. Double-check all connections to avoid leaks later on.
Install your countertop if it isn’t already attached. Seal edges with caulk for added protection against moisture and make that rustic look shine!
Tips and Tricks for a Professional Finish
Achieving a professional finish on your rustic bathroom vanity can elevate the entire space. Start by ensuring all surfaces are clean and free of dust before applying any paint or stain.
When sanding, use fine-grit sandpaper for a smooth surface. Focus on corners and edges to highlight that rustic charm. Don’t rush; take your time with this part.
For staining, consider using a foam brush or cloth instead of a regular paintbrush. This method allows for even application without leaving streaks behind.
Seal your work with polyurethane for durability. It protects against moisture while enhancing the natural beauty of wood grain.
Pay attention to hardware selection. Rustic knobs and pulls can tie everything together beautifully, adding character to your vanity without overwhelming it.
Maintenance and Care of Your Rustic Bathroom Vanity
Caring for your rustic bathroom vanity ensures it remains a stunning feature in your space. Start by regularly dusting the surfaces using a soft cloth. This prevents grime from building up and keeps the natural beauty of the wood visible.
For deeper cleaning, use mild soap mixed with water.Always dry thoroughly to prevent moisture damage.
Inspect hinges and drawer slides occasionally. Tighten any loose screws to maintain functionality.
Consider applying a protectant or sealant every year to guard against stains and wear. If you notice scratches, gently sand them down and touch up with matching stain or paint.
Be mindful of humidity levels in your bathroom. A well-ventilated area helps preserve both aesthetics and durability over time. Regular attention will keep your rustic vanity looking fresh for years to come.
Conclusion:
A rustic bathroom vanity can be the centerpiece that elevates your space from ordinary to extraordinary. With its warm wood tones and charming details, it brings a sense of coziness and comfort to your bathroom. By following the steps outlined in this guide, you can easily install your own rustic vanity while adding a personal touch that reflects your style.
As you complete the installation, remember that maintenance is key to preserving its beauty. Regular cleaning and proper care will ensure your rustic bathroom vanity continues to shine for years to come. Embrace this transformation as an opportunity not just to improve functionality but also to create an inviting retreat within your home.
Take pride in every detail from selecting the right hardware to choosing decor elements that complement the natural vibe of the wood. Each decision contributes to making your bathroom a sanctuary where you can unwind after a long day or prepare for new adventures ahead.
